Now that we have beautiful skin we have the perfect canvas for fun new spring colors and pretty makeup! There is something about makeup that makes me smile, it's like art or painting. You can use any colors you want and create bold or soft looks. Enhancing your natural beauty! Speaking of beauty... a friend of mine Mikhail Cox married our long time friend Philip Cox this past September
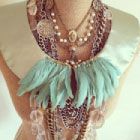
Isn't this picture amazing! Just stunning. I was honored to make her a hair piece for the big day and she wore it just beautifully
LOOK AT THOSE EYES! Mikhail is is the queen of makeup and so I asked her if she would share her secret to creating those amazing smokey eyes. And of course what makeup she swears by. Her friends insisted she begin documenting "how to" videos on You Tube on how to create these amazing looks.
Here she is with all the details...
To re-create my wedding day smokey eye you want to begin with a clean, primed eye-lid. This will ensure that you have no veins or discolorations altering your shadows. You want the truest shadow colors on your wedding day! I used MAC Paint Pot in Painterly to begin with a blank, color-less canvas to create this look. Apply it all over the eyelid, up to the eyebrow. I then used Maybelline Instant Age Rewind Double Face Perfector, just the high-lighter end, to highlight my brow bone, as well as the inner-half of my eyelid. Blend with your finger. The next steps are shown on the image:
1. Apply a nude/vanilla color all over your eyelid, up to your brow. I used the shimmer vanilla color in the L'Oreal quad: 508 Summer Dusk.
2. Apply a mixture of medium brown/tan/plum/gray in and above your crease. This creates a shadow effect for the deeper, darker colors you'll use in the outer corner and crease. I used the matte plum color in my 508 Summer Dust L'Oreal quad, the 2 medium browns in my 821 Neutrals L'Oreal quad, and the gray in my Shany Cosmetics pallet. I find this is best created with a medium crease brush.
3. Blending is ESSENTIAL in a smokey eye look. Use a blending brush to blend these colors together, focusing on leaving no harsh lines between any colors. Use circular strokes while blending from the inside of the eye to the outside of the eye.
4. Apply a mixture of dark brown and black shadow to the outter corner of the eye, as well as DIRECTLY in your crease, only about halfway across your eye. I find this is easy to apply with a flat angled brush. You want this to be significantly darker than the other colors you've used. (Also keep in mind, in professional photographs your makeup will be washed out, so don't be scared to go a bit darker.) I used a dark brown and black in my Shany Cosmetics pallet.
5. Blend again using a blending brush. Focus on creating a smooth gradient between colors. Darker on the outter half of your eye...lighter as you move to your inner corner. No harsh lines on your wedding day!
6. Apply another layer of the shade you used in step 1 only on the inner 1/3 of your eyelid, and onto your brown bone. Blend into the darker shade with a blending brush. Then apply a white/vanilla shade with very fine shimmers (or matte if you prefer) to the inner corner of your eye, and on the inner 1/3 of your bottom lashline. I used shade 100 Glam Ice by Rimmel London. I also applied and blended a small amound right under the peak of my brow. (White is a harsh color, so use sparingly.)
7. Line your bottom lashline, using a flat angled brush with the same combination of brown/black shadow that you used in step 4. I apply this to the outter 2/3 of my lashline. Using shadow creates a softer line, rather than a harsh black liner. This can be applied over some type of cream-shadow using the same brush to give it more staying power.
8. Line your top lashline with a water-proof liner. I love the look of gel liners. I used Maybelline Eyestudio Lasting Drama Gel Liner along with the brush that comes with it. I then used my flat angled brush to apply a black eyeshadow over the line to make it stay longer and look a little softer. Wing your eyeliner out just a bit to create the same shape.
(I wore Ardell false lashes on my wedding day and applied L'Oreal Voluminous Carbon Black Waterproof Mascara. In this tutorial I used Lancome Hypnose Drama mascara with no false lashes.
Check out Mikhail's You Tube Page - www.youtube.com/missmikhail
MAC Paintpot in Painterly - maccosmetics.com ($17.50)
Maybelline Instant Age Rewind Double Face Perfector - drugstores
L'Oreal Eyeshadow Quads - drugstores - (approx $8)
SHANY Cosmetics 40 Color Eyeshadow Pallet - shanycosmetics.com ($17)
Rimmel Glam Eyes in Glam Ice - ulta.com ($4)
Maybelline EyeStudio Lasting Drama Gel Liner - ulta.com ($10)
L'Oreal Voluminous Carbon Black Waterproof Mascara- ulta.com ($7)
Lancome Hypnose Drama Instant Full Body Volume Mascara - lancome-usa.com($25)


1 comments:
I just found your blog through Lindsay Letters and I love it! Thanks for all the great posts!
Post a Comment