Every year, I get out my Christmas decor and start trimming around the house being as creative as possible with what I already have. One of my most favorite places to decorate is the mantle. Usually a focal point in the house. Well to my dismay, I had totally forgotten the argument Mr. May and I had over putting the TV over the fireplace and of course Mrs. May won which meant my mantle was now a TV and not a place for me to put garland and artwork and such. I was sad for a day and then remembered a wise friends words "just make a faux mantle" as if it were a no brainer! And so I was off, trying to figure out with what and how and where would I put this new fantastic mantle. I recently had the opportunity of doing a pop up shop with Heritage Beam And Board a family owned business who specialize in taking historic barn wood and repurposing it into beautiful new creations. Of course we instantly connected, since I am all about repurposing old with new! Adam found me the perfect 4x6 beam that would now be the focal point for my holiday decor. A focal point that will come with us every move, I might add. Now to find the spot... I chose our dinning room, because I already have a distressed pine table and buffet and I thought the natural tones would accent well. Here is the wall before.
Wall cleared...
Got my beam ready...
Bought 2 L brackets and screws for all of $6
And then... the drill! I would not consider myself handy but I am willing to do what is necessary for pretty things on my wall!
Only messing up one time, I then began to add my decor layer by layer
The garland is from a wonderful old fashioned tree farm near our house Natures Best. With raw honey, 7 types of trees, garland, and simply stunning arrangements, I had such fun working with the Kiene's on a few designs for our home.
Made some yarn and burlap tree decor pieces I will post about later. 
Ok so the "Pink Chair" created a buzz on "how to" use spray paint, what kind and why? And luckily I just did a spray paint DIY project this week! I admittedly have an obsession with spray paint, and it is perfect for me because I am a Do It Now kind of person. When I get an idea in my head, I have to execute or it drives me crazy. Which means anytime I am getting tired of a room in my house or a piece of furniture, I have limitless options to change it up just by spray painting! Whats even better is how inexpensive it is and companies are now producing "non toxic" options with low oder and quick drying times... like 15 min!
This Krylon H20 is a good one to use with lots of color options.
There are many options... here are a few
This is the boring brown table I wanted to liven up a little. I literally just pulled it outside and spray painted the entire thing with 2 coats which was exactly 1 can.

I let it dry outside for 30 min before bringing it back in and here you have it. A lavender table! I do not like "perfection" so I don't mind if it is perfect or even or every little nook and cranny is covered. I like seeing a little of the wood or metal giving it more of an aged appearance. This is simply preference so you can do it however you like.
Here are a few other "Paint" projects throughout my home

Aqua Frame and Pink Deer Antlers
Painting by my daughter Ainsley
Metallic Silver on a once white bed frame
A DIY headboard I made for the girls room and hand painted the flowers to add some color
Metallic end table in nursery
Orange Mirror in my foyer
DIY fabric bracelet
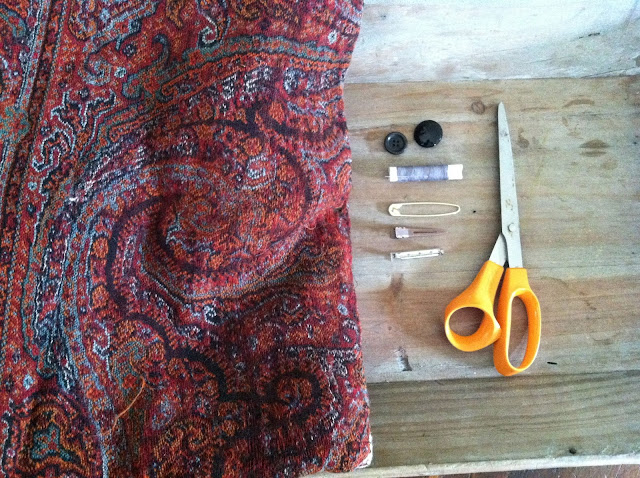
What you will need:
>A cool fabric with a bit of stretch to it ( mine is from my "yia yia's" vintage collection
>Scissors, thread, needle, backings and vintage buttons or embellishments
Cut a strip about a half inch longer than the size around your wrist
Cut 4 squares each smaller than the last
You will have one long strip of fabric and 4 squares
Turn the fabric to the back side and pinch across the top lining up the ends and sew tightly across
You should then have a wristband like this one
Stack your squares largest to smallest
Pinch down in the center and sew up and down shaping a bit to bring form
You should then have something like this
Hot glue or sew your backings on
Add vintage buttons or other embellishments like tool or lace
You will then have this beauty! But not just this because the flower is convertible and can then be placed on a scarf, headband, blazer coat or your fantastic new wristband
Be creative with your designs

